Blogs

Roselaine Marques
Hello everybody, like I promised on Dev24, here we are in the Blog Post with the complete step by step from start to finish. Here you can learn how to create an extension “Discount Rule Type” on Liferay Commerce, with a configuration option.
This is a link if you missed the session “Forget Amazon, help your users to buy with Alexa from Liferay Commerce (thanks to its headless APIs)” at Dev24 conference where we gave the introduction.
At this moment Liferay Commerce extensions don’t have BLADE templates and, because of that I will explain all project scaffolding here .
If you understand all the scaffolding needed, you will be able to build a lot of extensions for Liferay Portal 7.X and Liferay Commerce.
For the extension we will create a new rule discount based on the age of the buyer.
Step 1, creating our New Discount Type extension for Commerce:
1. Using Blade CLI, we can start creating our Liferay Workspace if you don’t already have one for Liferay 7.3.
blade init -v 7.3 liferay-workspace-7-32. Into your “Liferay Workspace” we’ll create a custom module (discount module)
blade create -t api -p com.liferay.commerce.discount.rule.by.age -c CommerceDiscountRuleByAge commerce-discount-rule-by-age
3. Now you should have this structure in your project

4. Open a gradle.properties with your favorite editor, uncomment and change the property value from “liferay.workspace.home.dir=bundle” to the path where your bundle with Liferay Commerce is installed (ej.: “liferay.workspace.home.dir=/Users/roselainedefaria/Liferay/Source/bundles”). This setup will help us to make the module deployment automatic.
5. Now, rename the package from “com.liferay.commerce.discount.rule.by.age.api” to “com.liferay.commerce.discount.rule.by.age” to eliminate the “api” which “blade CLI” generates automatically (because the template “api” was used).
6. In “bnd.bnd” file eliminate the “Export-Package: com.liferay.commerce.discount.rule.by.age.api” line.
7. Open the folder “resources” (i.e.:liferay-workspace-7-3/modules/commerce-discount-rule-by-age/src/main/resources) and delete everything into this folder.
8. Open the file “CommerceDiscountRuleByAge.java” and change the interface to a class, after that implement “CommerceDiscountRuleType” interface, save it.
9. Now we’ll add dependencies to our project, open the "build.gradle" file, delete everything into this file and add this code with the dependencies:
 dependencies {
  compileOnly group: "org.osgi", name: "org.osgi.core", version: "5.0.0"
  compileOnly group: "org.osgi", name: "org.osgi.service.component.annotations"
  compileOnly group: "com.liferay.portal", name: "com.liferay.portal.kernel"
  compileOnly group: "com.liferay.commerce", name: "com.liferay.commerce.api", version: "22.2.4"
  compileOnly group: "com.liferay.commerce", name: "com.liferay.commerce.discount.api", version: "7.0.0"
  compileOnly group: "javax.servlet", name: "javax.servlet-api", version: "3.0.1"
}
10. Come back to your “CommerceDiscountRuleByAge” class, import the package where the interface is and implement the three methods that are defined by the interface
11. Create a Key:
public static final String KEY = "key-rule-gold-person";
12. Mark this class as a @Component and inside we setup 3 properties. It should look like this, see below:
@Component(
      immediate = true,
      property = {
              "commerce.discount.rule.type.key=" + CommerceDiscountRuleByAge.KEY,
              "commerce.discount.rule.type.order=:Integer=61"
      },service = CommerceDiscountRuleType.class
)
On property array, setup 2 needed parameters for your discount module:
"commerce.discount.rule.type.key=" + CommerceDiscountRuleOldPerson.KEY
"commerce.discount.rule.type.order:Integer=61"
On service, declare the interface which we are implementing in this class:
service = CommerceDiscountRuleType.class .
13. Now in the method “getKey” set up “return KEY” that we declared before, and in the method “getLabel” only for the sake of testing a module, set up “return “New Custom Discount Type”. The final @Component class should look like this:
package com.liferay.commerce.discount.rule.by.age;
import com.liferay.commerce.context.CommerceContext;
import com.liferay.commerce.discount.model.CommerceDiscountRule;
import com.liferay.commerce.discount.rule.type.CommerceDiscountRuleType;
import com.liferay.portal.kernel.exception.PortalException;
import org.osgi.service.component.annotations.Component;
import java.util.Locale;


@Component(
      immediate = true,
      property = {
              "commerce.discount.rule.type=" + CommerceDiscountRuleByAge.KEY,
              "commerce.discount.rule.order=:Integer=61"
      },service = CommerceDiscountRuleType.class
)
public class CommerceDiscountRuleByAge implements CommerceDiscountRuleType {

  public static final String KEY = "key-rule-gold-person";

  @Override
  public boolean evaluate(CommerceDiscountRule commerceDiscountRule, CommerceContext commerceContext) throws PortalException {
      return false;
  }

  @Override
  public String getKey() {
      return CommerceDiscountRuleByAge.KEY;
  }

  @Override
  public String getLabel(Locale locale) {
      return "New Custom Discount Type";
  }
}
14. Deploy it by executing the following command into your “Liferay Workspace” folder.
liferay-workspace-7-3 % ./gradlew deploy
15. If everything is Ok, the result should look like this (sending your module to your “Liferay Portal/DXP Bundle"):
> Task :modules:commerce-discount-rule-by-age:deploy
Files of project ':modules:commerce-discount-rule-by-age' deployed to /Users/roselainedefaria/Liferay/Source/bundles/osgi/modules

BUILD SUCCESSFUL in 4s
Go to: Open Menu > Commerce > Discounts > Add New Discount. Once the discount is created, at the bottom there is the box for “Rules”, click on “+” to add new. The new “Discount Rule Type” created should appear on the list in your portal.
The code used in this step is available on a tag called “step-1” on github.

Step 2, eliminating the hard-code and internationalizing:
As you know, it is a bad practice using a String with a hard-coded value like we did in the previous step in the “getLabel” method (especially on a multi-language portal). It's important to have a multi-language module, like many things in the Liferay world, so we need to transform the module to have multi-language capabilities.
1. So... in the “getLabel” method you will use a “ResourceBundle” object. Copy the snippet code below and paste into the “getLabel” method. Then import all the packages needed.
ResourceBundle resourceBundle = ResourceBundleUtil.getBundle( "content.Language", locale, getClass());
return LanguageUtil.get(resourceBundle, "discount-rule-by-age");
The “locale” comes from the current user.
The “getClass()” is the classLoader for your resource bundle loader.
The “content.Language” is the base language file name.
2. Now, you need to create the language properties file in the “resources” folder:
Within the resources folder (i.e.: liferay-workspace-7-3/modules/commerce-discount-rule-by-age/src/main/resources), you will create a new folder called “content”
Inside the ”content” folder you have to create the default language file called “Language.properties”, and in this case the “Language_pt_BR.properties” and “Language_es_ES.properties” files.
Copy the key declared before “rule-gold-person” in the “getLabel” method. Include it in the 3 properties files (below you can find the key with each translation).
In Language.properties:
discount-rule-by-age=Discount Rule By Age
In Language_pt_BR.properties
discount-rule-by-age=Regra de Desconto por idade
In Language_es_ES.properties
discount-rule-by-age=Regla de Descuento por edad
3. Save and deploy it by executing the following command inside your Liferay Workspace folder.
liferay-workspace-7-3 % ./gradlew deploy
In Liferay Portal/DXP, go to: Open Menu > Commerce > Discounts > Click on the discount rule created before. At the bottom, there is a box for “Rules”, click on “+” to add a new rule. As the result, on the list, it should appear the new text “Discount Rule By Age” created.
4. In order to test other languages (Portuguese and Spanish):
- Go to “localhost:8080” and at the end of the URL add “/es-ES/“ (http://localhost:8080/es-ES/), then press enter.
- Then go to Open Menu > Commerce > Discounts > Click on discount created before, at the bottom, there is the box for “Rules”, click on “+” to add a new one. As the result, on the list, it should appear the new text translated to Spanish “Regla de Descuento por edad”.
- Go to “localhost:8080” and at the end of the URL add “/pt-BR/“ (http://localhost:8080/pt-BR/), then press enter.
- Then go to: Open Menu > Commerce > Discounts > Click on discount created before, at the bottom, there is the box for “Rules”, click on “+” to add a new one. As the result, on the list, it should appear the new text translated to Portuguese “Regra de Desconto por idade”.
Congratulations! So far you have created your first extension Commerce module internationalized.
The code used in this step is available on a tag called “step-2” on github.
Step 3, applying the logic to discount by age:
1. Go back to your Component class “CommerceDiscountRuleByAge”, inside the “evaluate” method you will retrieve the CommerceOrder from CommerceContext, and validate if commerceOrder is NULL (to stop the flow).
CommerceOrder commerceOrder = commerceContext.getCommerceOrder();

if (commerceOrder == null){
  return false;
}
2. At the bottom of the class, inject the service “UserLocalService” with the @Reference annotation.
@Reference
protected UserLocalService userLocalService;
3. In the “evaluate” method, now you will fetch the user, using the “userLocalService”.
User user = userLocalService.fetchUser(commerceOrder.getUserId());
4. Implement a little more code to get the age from the current user, and validate if the rule will be applied.
Calendar birthdayCal = CalendarFactoryUtil.getCalendar();
birthdayCal.setTime(user.getBirthday());

int birthdayMonth = birthdayCal.get(Calendar.MONTH) +1;
int birthdayDay = birthdayCal.get(Calendar.DATE);
int birthdayYear = birthdayCal.get(Calendar.YEAR);

LocalDate birthdayLocalDate = LocalDate.of(birthdayYear, birthdayMonth, birthdayDay);
LocalDate now = LocalDate.now();
Period period = Period.between(birthdayLocalDate, now);

if(period.getYears() >= 70){
  return true;
}
5. After finishing, the “evaluate” method, should look like this:
@Override
public boolean evaluate(CommerceDiscountRule commerceDiscountRule, CommerceContext commerceContext) throws PortalException {

  CommerceOrder commerceOrder = commerceContext.getCommerceOrder();

  if (commerceOrder == null){
      return false;
  }

  User user = userLocalService.fetchUser(commerceOrder.getUserId());

  Calendar birthdayCal = CalendarFactoryUtil.getCalendar();
  birthdayCal.setTime(user.getBirthday());

  int birthdayMonth = birthdayCal.get(Calendar.MONTH) +1;
  int birthdayDay = birthdayCal.get(Calendar.DATE);
  int birthdayYear = birthdayCal.get(Calendar.YEAR);

  LocalDate birthdayLocalDate = LocalDate.of(birthdayYear, birthdayMonth, birthdayDay);
  LocalDate now = LocalDate.now();
  Period period = Period.between(birthdayLocalDate, now);

  if(period.getYears() >= 70){
      return true;
  }

  return false;
}
6. Save and deploy it by executing the following command inside your “Liferay Workspace”.
liferay-workspace-7-3 % ./gradlew deploy
In addition you can add some logs in this class, see more on my GitHub repo.
The code used in the previous step is available on a tag called “step-3” on github.
Testing:
- In Liferay Portal/DXP, go to Open Menu > Commerce > Discounts > Click on the discount created before. At the bottom, there is the box for “Rules”, if there is some rule, delete it, then click on “+” to “Add Discount Rule”. As a result, on the list it should appear the “Discount Rule By Age '' created, give a name and press “Submit”. On the list rules, make sure that there is only the discount you created to test it.
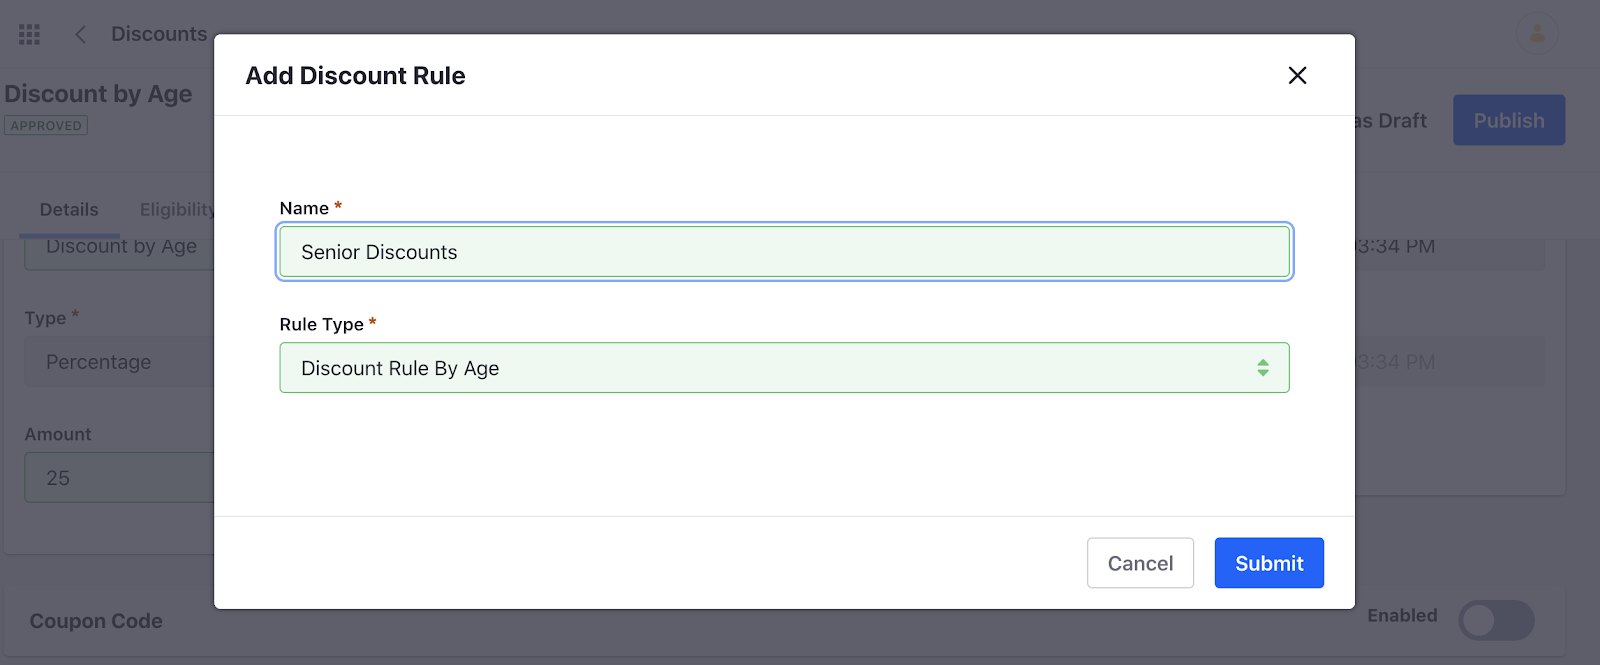
The discounts settings should be more or less like this (highlighted some important fields to set up):

In the “Eligibility” tab you can see other configurations to configure the scope this discount applies to “Specific Account Groups”,”Specific Account” or “Specific Channel”.

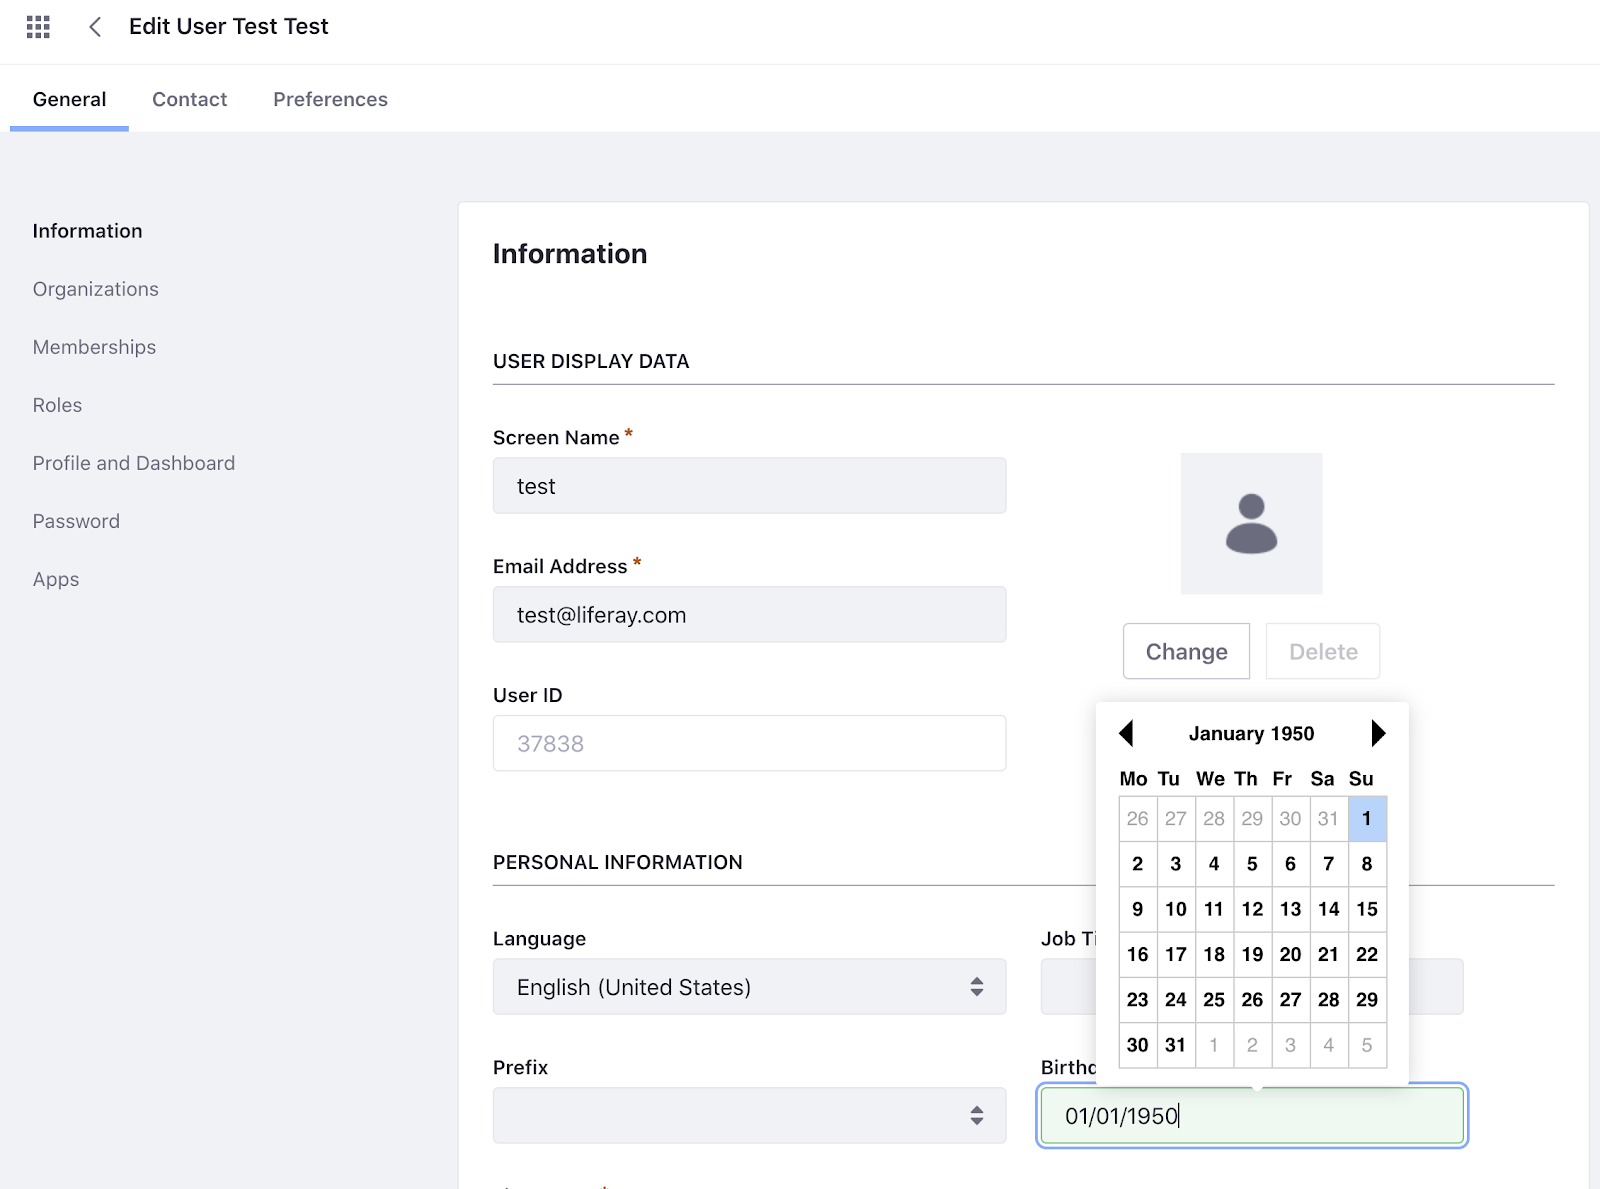
Now it is necessary to have a user who is over 70, to test it. Go to: Open Menu > Control Panel > User and Organizations > Click on current user, and change the “Birthday” date in order to make more than 70 years old.
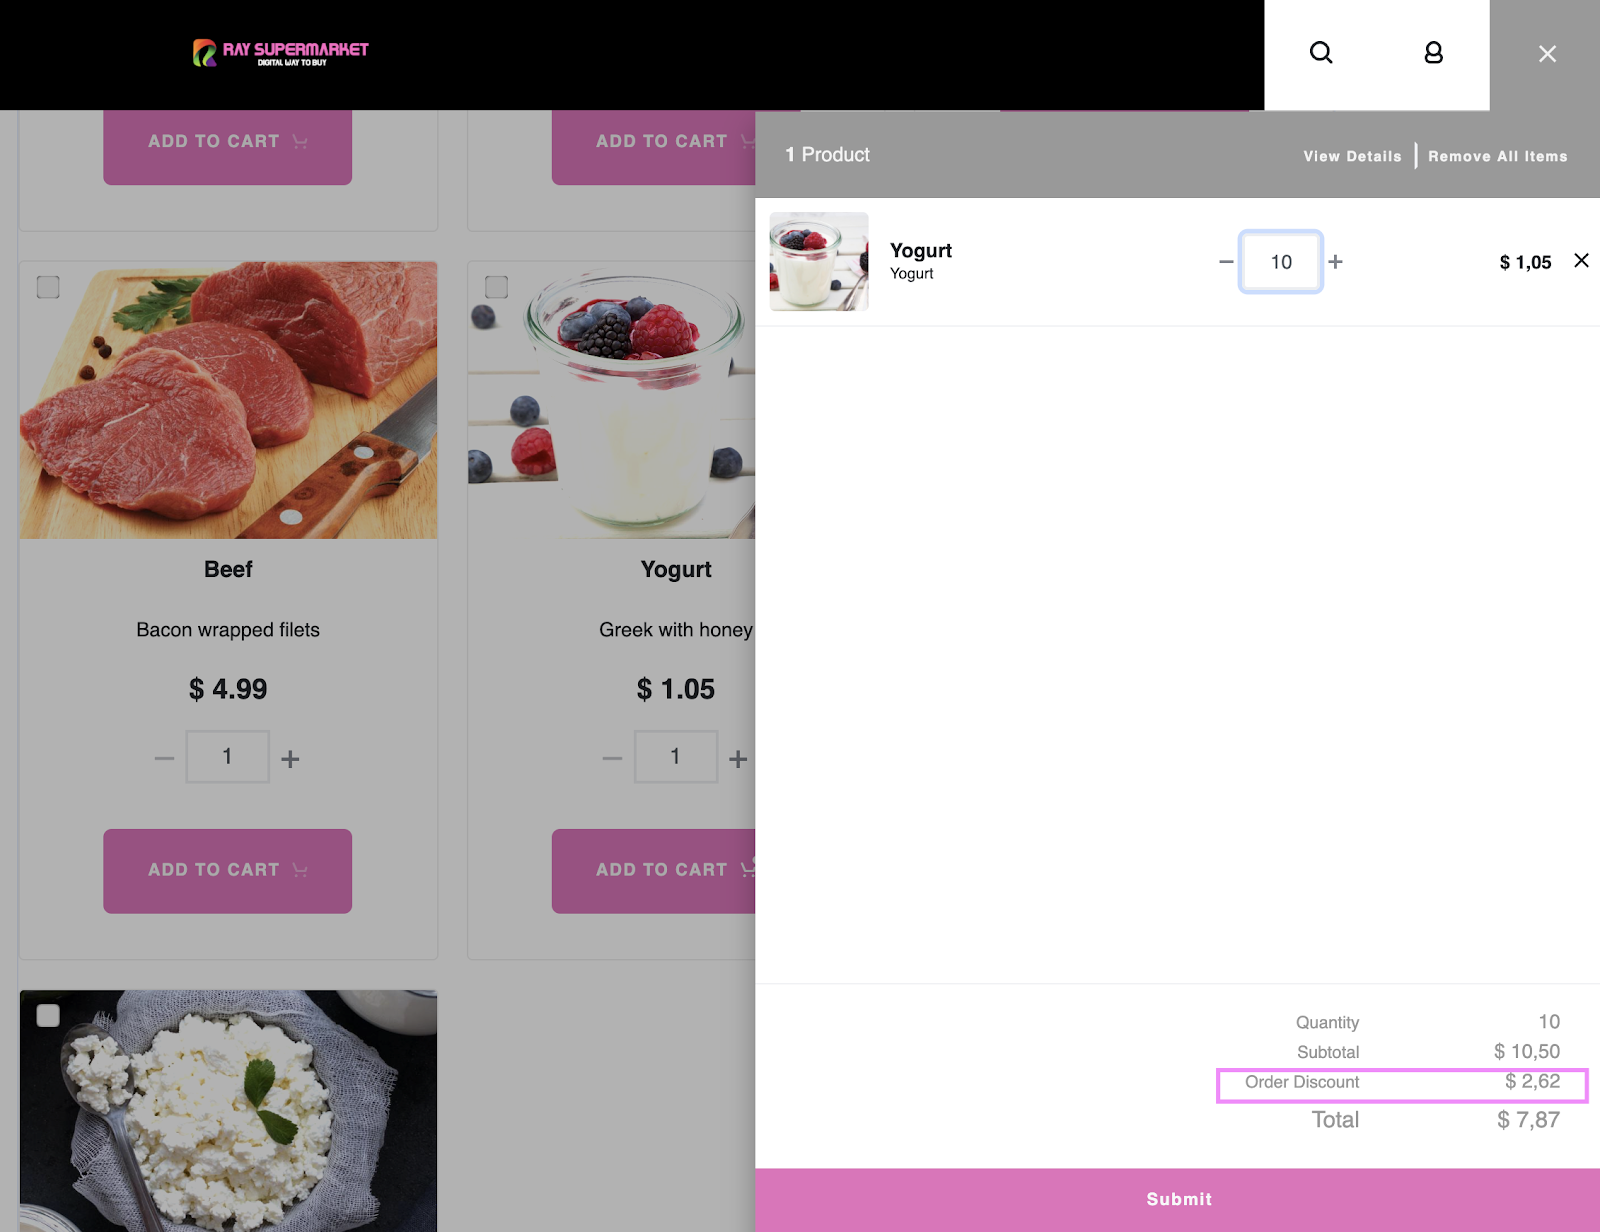
Go to your Commerce site and test (if you don’t have one site created, you can see here, how to create with the Accelerators). Add some products to the cart and here we go! You should be able to see your discount applied (image below).
So there you go, module finalized, but we can do better, in the next blog post, you will learn how to make the age configurable and eliminate the "age" hard-coded from your code.
Related Assets...
More Blog Entries...


